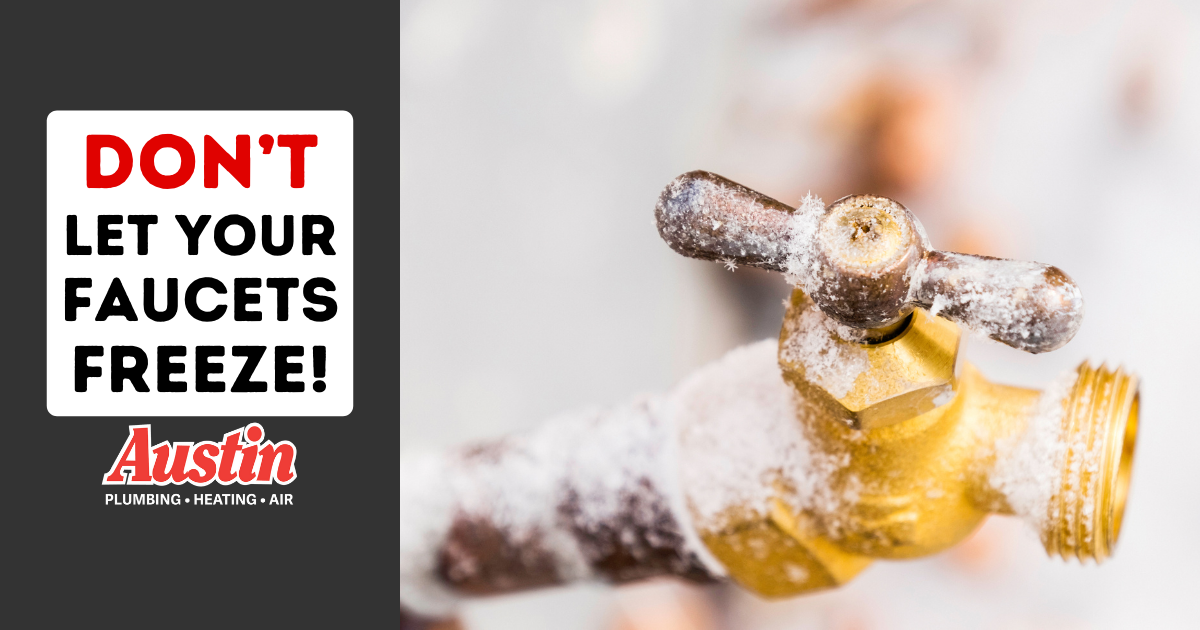
Winterize your hose bibbs before winter comes, because after is too late! Our Master Tradesman is here to show you how.
Winterizing your hose faucets and pipes is something you can learn to do for yourself in order to save on stress and money over the course of the year. If the concept of winterization is totally new to you, you’re far from alone. In fact, most customers stand to benefit from having a proper introduction to the topic!
What exactly is “winterizing”?
“Winterizing” is an industry term that refers to the process of preparing your hose systems for long periods of dormancy during the cold months. Really, it’s as simple as that.
Now that you know the “what”, let’s get right into why, when, and how you should approach it. (At the end of the article, you’ll find our easy-to-follow, step-by-step winterization guide so you can go ahead and get started.)
Why winterize your hose faucets or hose bibb?
The main reason to winterize is to prevent broken, busted water pipes. A hose faucet (or hose bibb) that isn’t properly prepared for the winter is one susceptible to freezing and cracking, which can cause extensive damage to your home. Furthermore, winterizing actually extends the life of the hose bibb itself. And lastly, winterizing now means no leaking or spraying later when the cold season is finally over.
When should you winterize?
This one may sound self-explanatory (and in some places, it probably is), but the answer really depends on your environment. If you’re located in Wisconsin like we are, you’ve probably already noticed how capricious and unpredictable its weather patterns can be. It’s the reason many residents like to head south for the winter. For clients who spend the winter away, we recommend getting it done before you go-even if it’s “not that cold” yet!
In general, you should at least aim to winterize your faucets before the season of hard, overnight frosts and extended, below-freezing temperatures sets in. It’s normal to plan on winterizing some time in October. To be safe, though, it’s best to winterize as soon as you’re finished with all of your outdoor work for the season. Again, it’s wise to do so even if you finish “early” (before the temperature drops significantly).
FAQ
My hose faucet is frost-free. Do I still need to winterize it?
Good question. Regular, old-school spigots require winterization on a strict yearly basis-but these days, Wisconsin requires hose faucets be “frost-free” to avoid the dangers of winter-wrecked pipes altogether. This means that if you have a newer hose system (installed in the last 20 years or so), yours is probably frost-free.
In a frost-free system, the handle that you turn to run water outside of the home actually opens and closes a valve inside the home. This valve can usually be found 10 to 12 inches inside the building envelope. During normal operation, shutting off a frost-free hose bibb from the outside diverts the water from that part of the piping and causes it to flow directly to the home’s exterior, which means your outside piping doesn’t retain all that water. Thus, it won’t become full of ice or suddenly be forced to expand when the weather freezes.
To put it simply: properly-installed, frost-free hose faucets are made to survive the winter without any know-how or intervention required on your part. However, for maximum protection we still recommend winterizing them as normal. Taking precautions to preserve your hose faucet/piping is never a bad thing-nobody ever regrets being careful with their plumbing system!
I have an insulated faucet protector. Can I skip winterization?
Here in Wisconsin, the answer is unfortunately NO! The fact is that insulated/outdoor faucet protectors just aren’t adequate to replace basic winterization procedures.
That’s not to say insulation provides no protection for your hose faucet. It’s essentially a foam shield that goes around the hose faucet. Theoretically, this shield protects against brief, unexpected lows-but it’s not capable of preventing frozen/burst pipes in the thick of winter. Since you’ll ultimately have to winterize anyway, this “solution” is redundant and not recommended.
If you’re considering getting an insulated faucet protector, our advice is to save your money. There’s a reason plumbing and HVAC companies-at least, honest ones-recommend winterizing.
How to winterize your hose faucet/hose bibb:
This process can be done with only one person, but it requires some walking back and forth between the indoor and outdoor valves. As you read along, you’ll begin to see how soliciting help from a friend can speed things up significantly.
- Remove the garden hose from the hose faucet. The number one cause of hose faucet problems across the board-from the frost-free kind to the regular old spigots that Austin Plumbing, Heating & Air deals with-is leaving a garden hose attached to it all winter long. This will stop any faucet, even a frost-free one, from being able to drain adequately. Your future self will thank you for unscrewing it ahead of time.
- Go into your basement and turn off the water that feeds the outdoor faucet. To locate the valve in your basement, look where the piping leads toward the hose faucet outside.
The two basic types of valves commonly used in hose systems are lever-handle (or ball-valve) and circular-handle (or gate-valve). The former must be rotated clockwise until you see that the handle is oriented perpendicular to the pipe*. For the latter, simply rotate it clockwise as far as you can, until it won’t turn anymore.
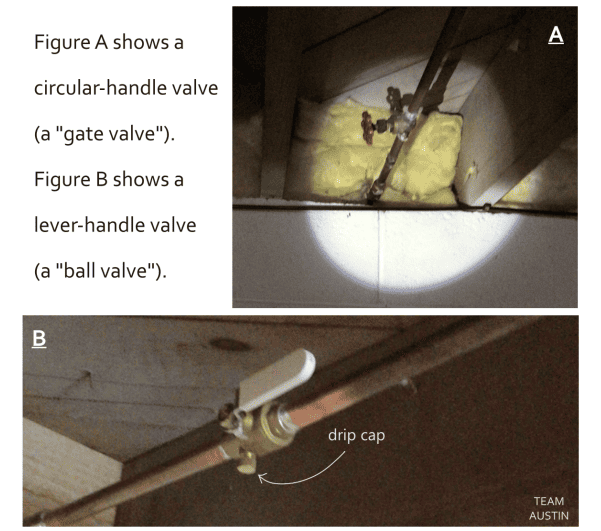
*In the example above, the lever valve in figure B is shown ON/OPEN and PARALLEL.
3. Head outside again and open up your hose faucet to drain the exterior part of the piping. Don’t be concerned with how much or little comes out. Simply leave the hose faucet in the open position on the exterior of the home.
4. Back in the basement, remove the drip cap from the interior valve. (Refer back to the image in step 2 for the location of the drip cap.) We do this to release the airlock on the system and allow full drainage of the portion of piping that runs between the shut off valve and the exterior of the home. You should expect to see only a small amount of water come from this step; a small cup should be sufficient to catch it.
If you notice a constant drip, that’s the sign that the shut off valve is not holding, in which case you’ll need our help to repair it.
Once the water stops dripping from the cap, you can replace the drip cap.
5. Go out to the exterior of the home a final time. You can now close (shut off) the hose faucet.
If you follow these steps to winterize your hose faucet/hose bibb at the end of summer, it’ll be a breeze to get it running again next spring. Don’t forget to call us if any issues arise. Happy winterizing!